This post may contain affiliate links, which means we may receive a commission, at no extra cost to you, if you make a purchase through a link. Please see our full affiliate disclosure for further information.
Embed Pinterest Pins To WordPress Blog
Struggling to embed Pinterest Pins to your blog post?
Does your pins appears too large or too big on your blog post?
Do you want your Pins to appear small in your blog post and appear the same size when saved by your users to their Pinterest accounts?
Then you have come to the right place my friend.
In this step-step tutorial, I will teach you how to do that step-step. You will learn to embed Pinterest pins and make it appear small, medium sized or large in your post.
Follow these steps
Step 1 –
Install Headers and Footers by WPBeginner

Go to your Wp-admin dashboard > Plugins>Add New
Look for headers and footers by wpbeginner. Install and activate.
Step 2
Go to your Pinterest account.
Step 3
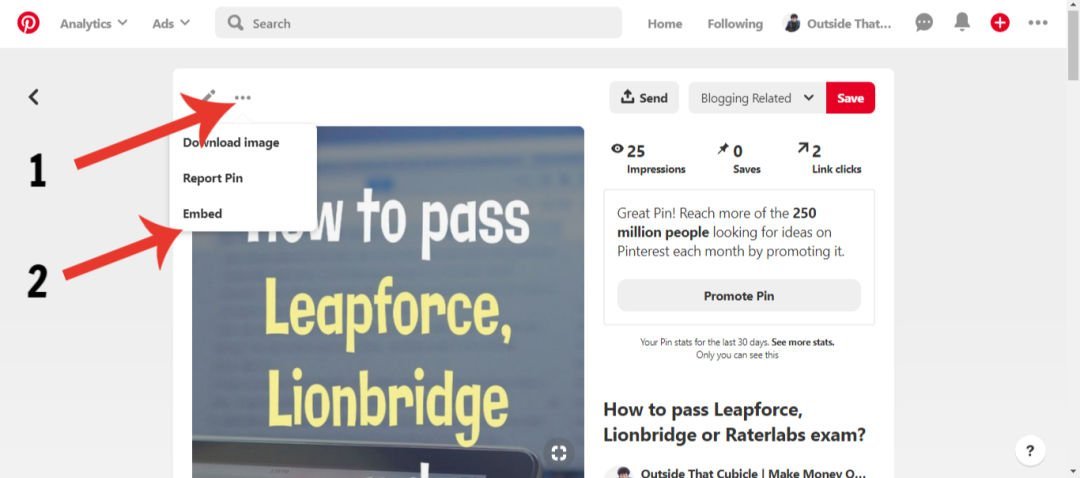
Select the pin that you want to embed. Click on it.
You will see something like this .

Click on that three dots that you see on the top left of your pin.
Step 4
Click on embed.
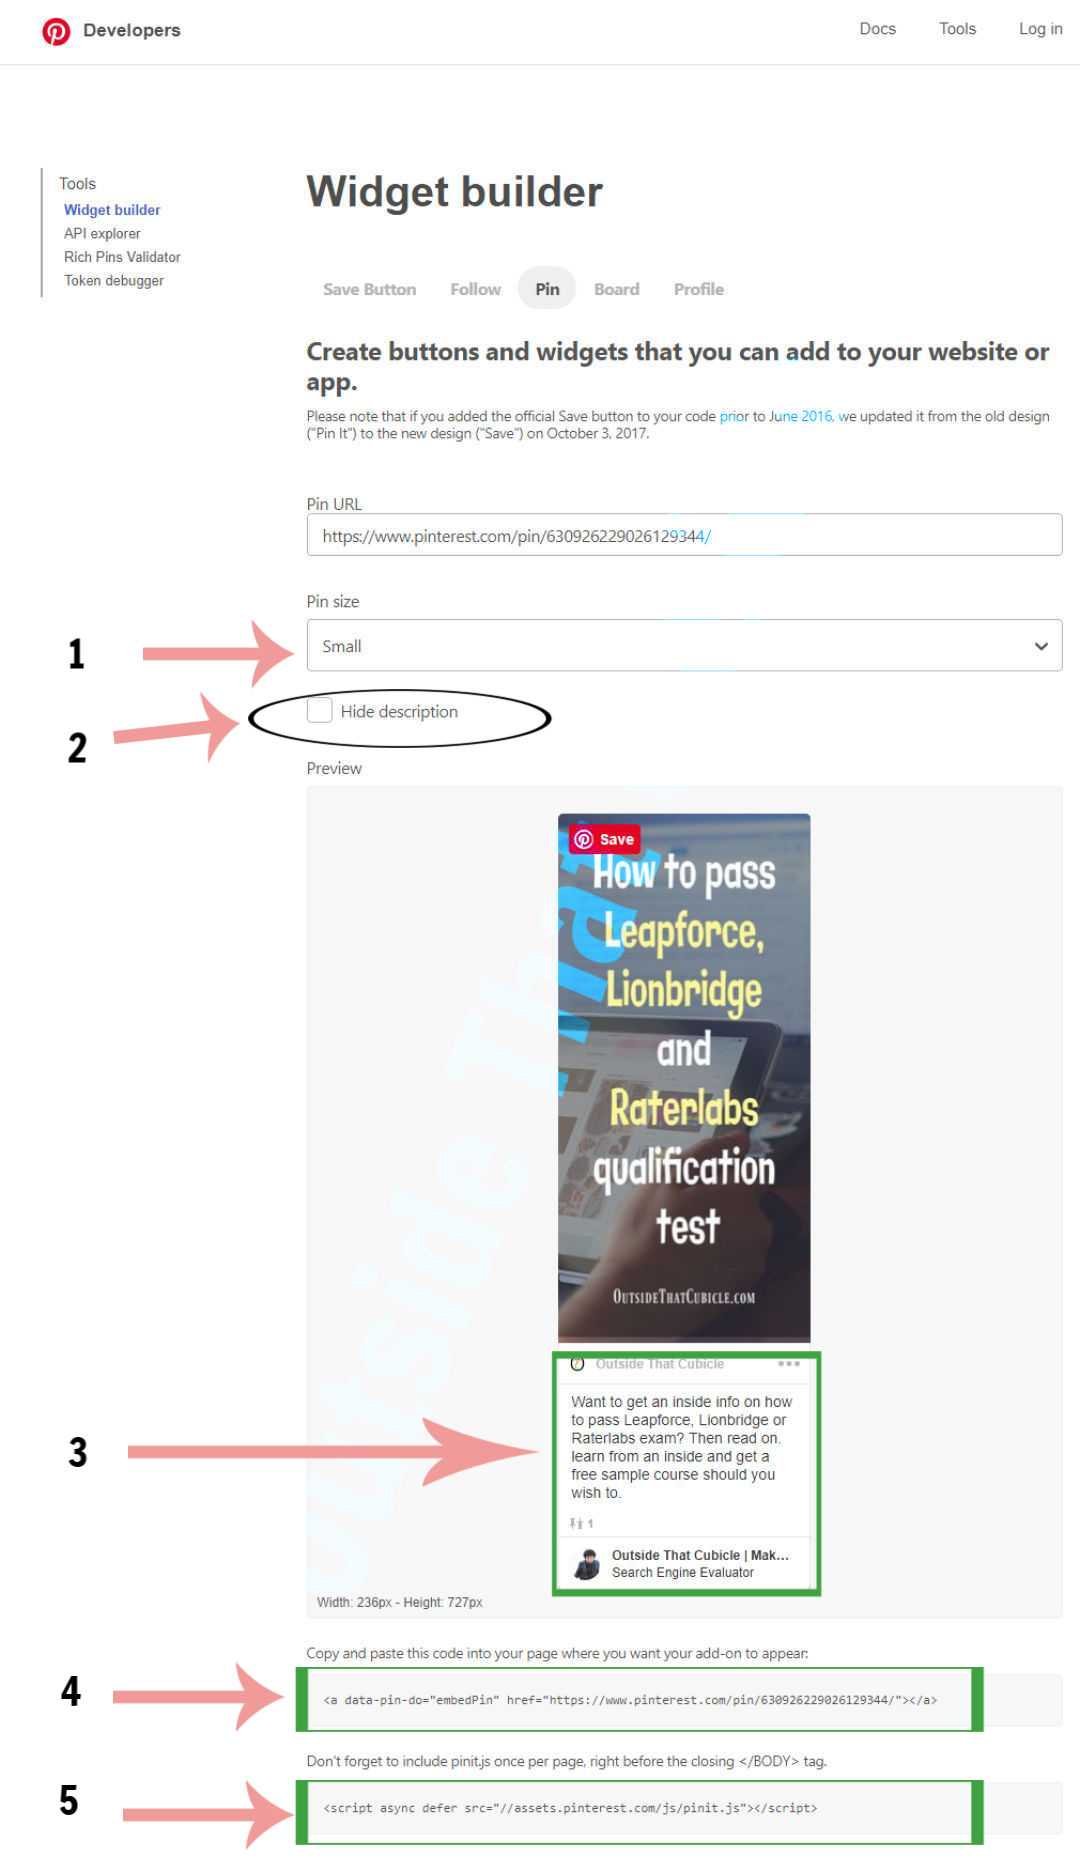
Clicking on embed will take you to a page like this.

Step 5
Take a careful look at the image above. Compared it with the one you have and notice all the numbers I placed on the image above and follow the steps below –
- First Step – In the image above, right next to #1 you would see the pin size. If you click on it, there would be an option to select different sizes – small, medium, large – from the drop-down.
- Second Step – In #2 , you can choose to hid the pin description. You don’t want the pin description showing up in your blog post. Check that box.
- Third Step – This shows the pin description when the box in #2 is not ticked. You can tick or untick box at #2 to preview.
- Fourth Step – This is the most important step of all. In the section numbered 4, there is a code that you want to copy.
- Copy that code, go to your blog post, enable text editor, paste that line of code where you want your pin to appear.
- If you use Gutenberg, click on “Custom HTML” block and paste that code.
- Hit update.
Final Step –
Remember I asked you to install – headers and footers by WPBeginner right in the beginning.
From the #5 in the above image, copy the code in the footer section of your headers and footers.
Here is how to do it –
- Go to settings
- Find Insert Headers and Footers
- In the Scripts in Footer section, paste the code copied from #5 above.

Hit Save.
N.B. For all other pins that you want to embed to your blog posts, you don’t need to re-copy the code from #5 in the above image. Once done, you are good to go. So the final step in this tutorial needs to be done just once.
Now go to your blog post and view it in the new tab.
Voila !
You have just embedded a Pinterest Pin to your blog post.


Nice! It’s good that you provide the steps on how to do it with images and video. It makes it easy for people to understand and follow. Thank you for sharing!
Thank you Michael 🙂